

Microsoft SwiftKey is a virtual keyboard full of settings that can be modified quickly. When you access it, you can view a list with all available functions. Among them are some input options, such as voice typing and the possibility to set up gestures to trigger functions. You can also customize it by defining a specific theme or changing the position of the keys. In the following lines, you will learn what it is and how to use SwiftKey, available for Android and iPhone (iOS).
What is SwiftKey and how does it work?
SwiftKey is a virtual keyboard with a great capacity to store the user’s preferences. This way it can learn about your writing style and make the whole typing process much faster and more convenient. In addition, it allows you to make several customizations for even more convenience, such as setting a theme and making layout changes.
After downloading the keyboard application, the first step is to make it the default. On Android, just go to “Settings” and choose SwiftKey from the “Language and input” options. On iOS, tap “Settings” > “General” > “Keyboard” and “Add new keyboard”. Then look for SwiftKey in the list and enable it. This will make it the keyboard you use in any app you need to type on.
In which cases can it be useful?
SwiftKey is useful when the user is tired of the conventional alternatives and wants to try a keyboard with smarter typing predictions to speed up typing. In addition, the application is also useful for those who like to have several customization options, since it is possible to configure it according to personal tastes and needs.
In addition, it can also be used if you switch between different cell phones and want to use the same preferences in all, because the service allows you to save them in the cloud – the SwiftKey Cloud. By activating this service, the keyboard can also learn about the typing done in other apps, such as WhatsApp, Facebook, Gmail, and Twitter.
How to set up the keyboard in general?
The SwiftKey application menu is full of settings that can be modified quickly. When you access it, you can see a list of all available functions. See below how to customize each one of them:
1. Activate the number row
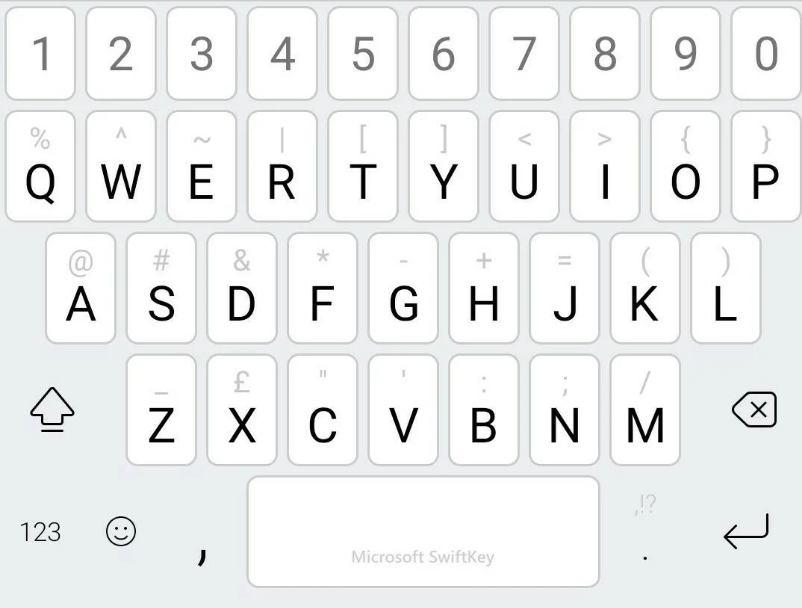
On many keyboards, you need to activate a submenu every time you want to type a number. But to activate a fixed number row in SwiftKey, just open the app, tap “Layouts and Keys” and activate the “Number List” option. Once this is done, simply scroll down and set whether the number row is displayed in the upper, left, or right corner.
2. Inserting Emojis, Gifs, and Pictures
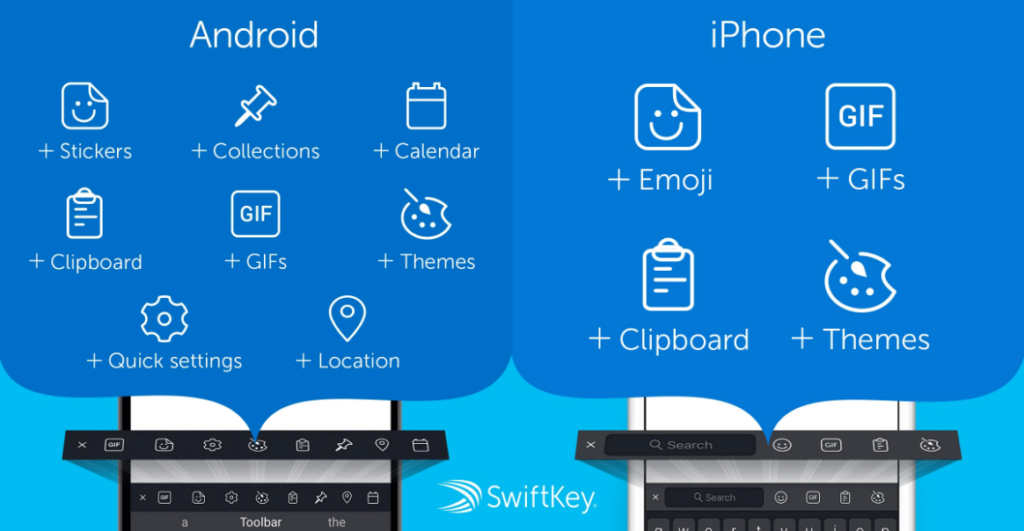
With the keyboard open, look at the top left corner and select the type of content to be inserted between Emojis, Gifs, or Photos. Then, when you find what you’re looking for, just tap on it to send it. If needed, you can also search for a keyword in the search bar or use the bottom menu to search by category.
3. Saving content to the Clipboard
If you want your copied items to be saved for later use, go to the keyboard settings and tap “Advanced Input” > “Clipboard”. Then enable the “Remember copied items” option. This will allow you to see the items at the bottom of the page and then decide whether you want to swap and edit them.
By default, saved content is available for up to one hour, but you can extend this time by adding a keyboard shortcut for an important item. To do this, tap on it on the Clipboard.
4. Change the keyboard position
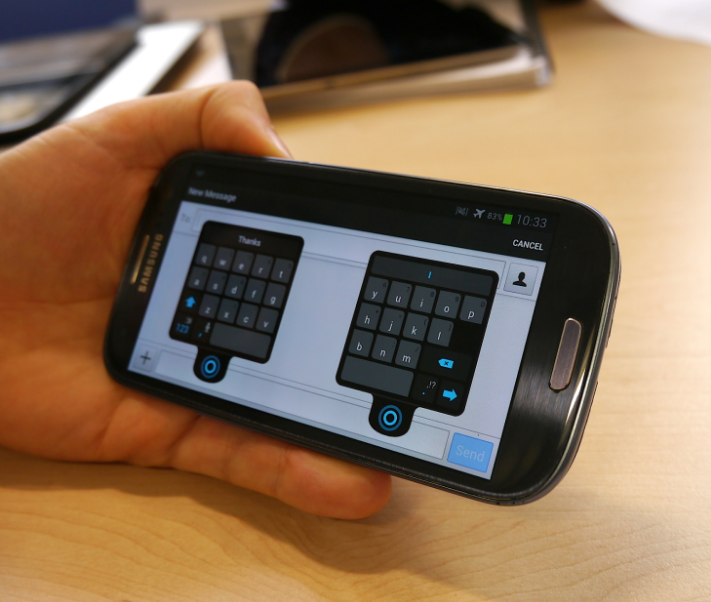
If you notice that SwiftKey is not in the best position for typing, tap the three dots at the top, and then tap “Modes”. Then select the “Floating” option and use the two little dashes that appear below the space button to move the keyboard anywhere on the screen.
In the same menu, you will find the alignment option, which allows you to set the buttons a little to the left or right. In the “Thumb” option you can split the keyboard in two to make typing with your thumbs easier. But if you are not satisfied with any of the possibilities, simply tap the first button to reset the keyboard position.
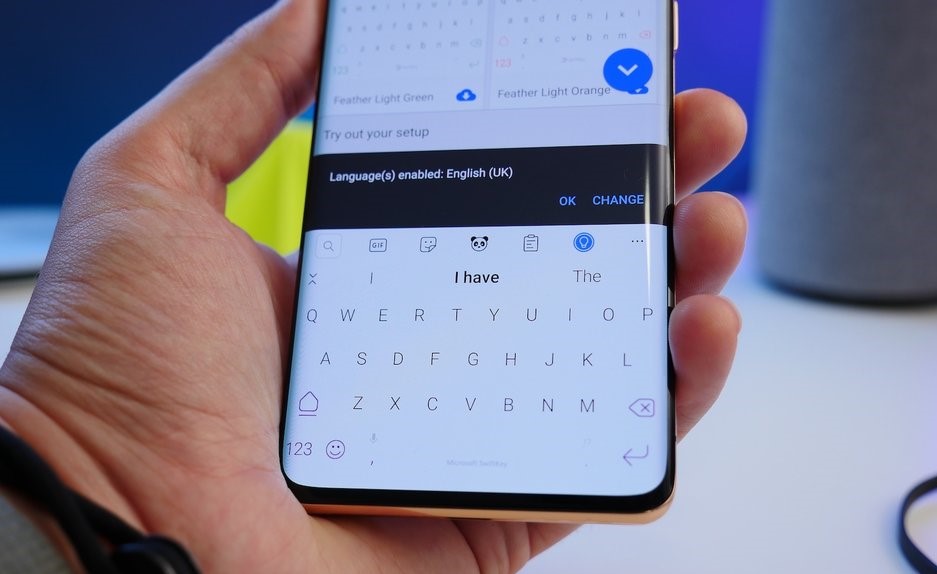
5. Change the layout/theme
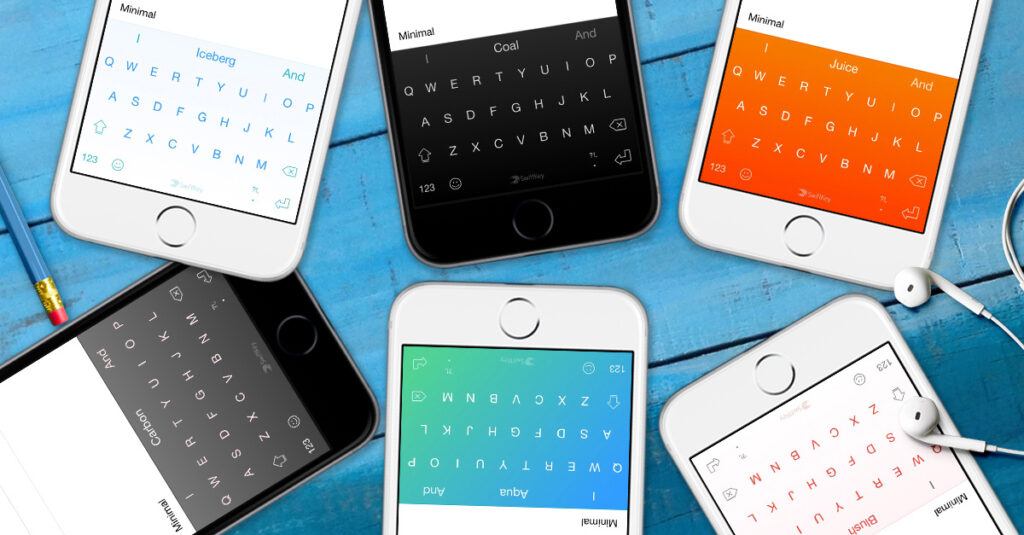
To change the layout of SwiftKey, open the keyboard, tap the three dots at the top, and select “Layouts”. Then simply tap one of the available options: Azerty, Colemak, Dvorak, Qwerty, Qwertz, and Qzerty.
To change themes, click on the three dots and then on “Themes. Then choose one of the available options and download it. Also, in the “Yours” tab, you can check the themes already downloaded and the ones that came pre-installed. Under “Customize”, you can create your theme.
6. Set up voice and gesture methods on the keyboard
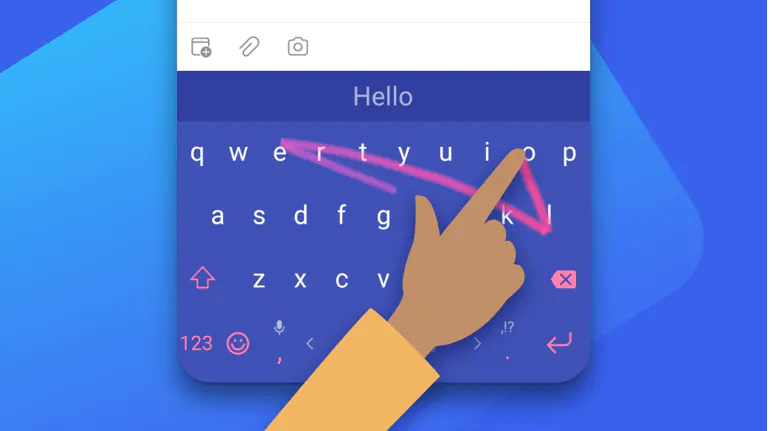
The keyboard comes with the SwiftKey Flow function enabled, which makes it possible to slide your finger over the letters and thus form words. However, you can disable the function and activate the gesture mode. To do so, open the app, go to “typing,” tap on “Gesture input,” and check the “Gestures” option, which will allow swiping left to delete a word, or down to hide the keyboard.
To use voice typing, open the application, select “Advanced input” and enable the “Voice transcription” option. Then go back to the keyboard and observe if a microphone icon appears on a key next to the space button. Then hold it down for 1 second and the microphone will be activated to start speaking. When you are finished, simply tap the blue button.
This post may contain affiliate links, which means that I may receive a commission if you make a purchase using these links. As an Amazon Associate, I earn from qualifying purchases.